Windows is one of the most popular operating systems used by millions of users around the world. One of the important features of Windows is the ability to share files and folders with other users on a local network or the Internet. Information exchange between users is an important process. To facilitate this process, the systems required to exchange information should be placed in a common network.
Among the different types of information exchange, sharing is one of the most used methods. In this way, you can share a folder and put the required information in it so that other users can access it. This method allows you to set and manage each user’s access level. In this article, stay with IT expert Raymand24 to learn how to share a folder in Windows.
How to share files
The following steps can be used to share files in a local network:
- First, put the files you want to share on the local network into a folder.
- Then right-click on the desired folder. and select the Properties option
- Select the sharing tab in the opened window
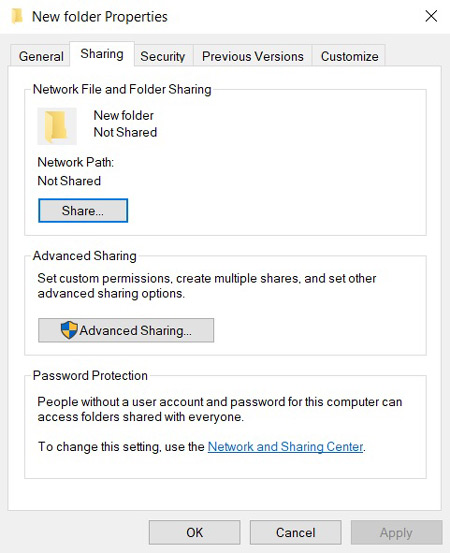
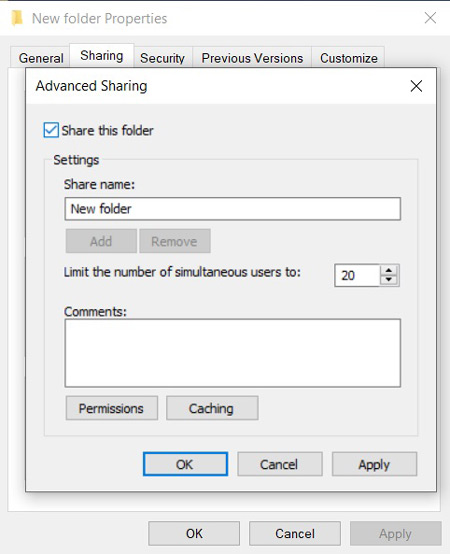
- Now click on the Advanced sharing button
- And finally, check the Share this Folder option
Set permissions for shared folders
When you share a folder, you need to determine how much access each person has. Access settings are as follows:
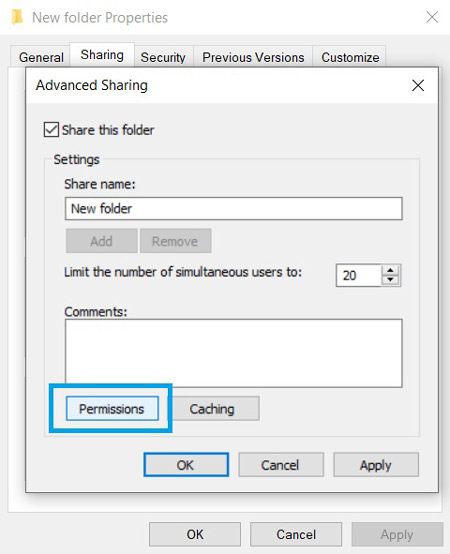
In the Advanced sharing window, after ticking the Share this Folder option, click on the Permissions button. In this section, you can define the level of access to this folder for users.
Now, for this, in the Permissions page of the GROUP and USER section, click on Everyone, and then you can specify the access level from the access section at the bottom of the window. This level of access includes the following.
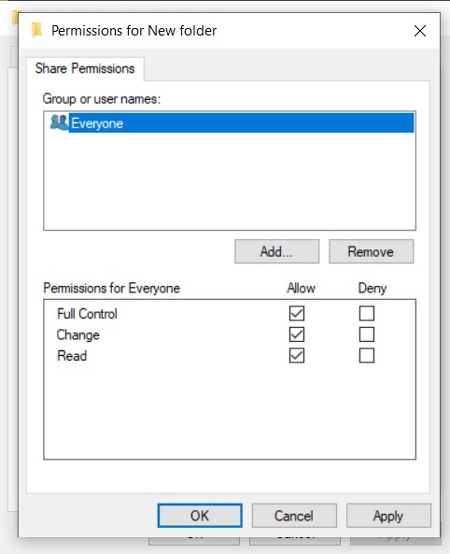
| Read access | If you give users read-only permission for files and folders, they can see the contents but not modify them. |
| Write access | By defining write access, users can modify files and folders or create new files. |
| Access Full Control | If users have “Full Control” access, they can perform all operations related to the folder, including deleting, renaming, and creating new files and folders. |
Fixed shared folder access problem
You may encounter problems accessing folders that are shared in Windows. Some of the things that should be checked are:
Checking whether the file-sharing service is active in Windows
Ensuring that the sharing service is enabled in Windows is one of the things that must be checked to solve the problem of accessing the shared file. To activate this service, you must do the following steps in order:
- First, open Windows Start. Enter the Windows settings
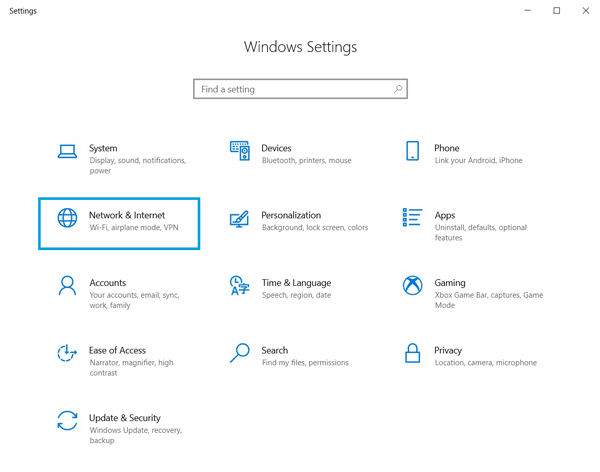
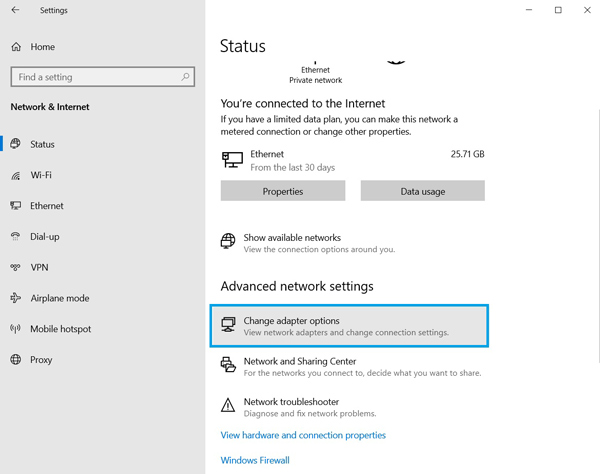
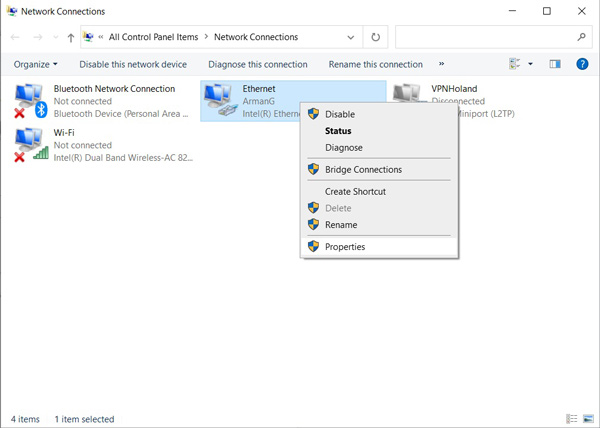
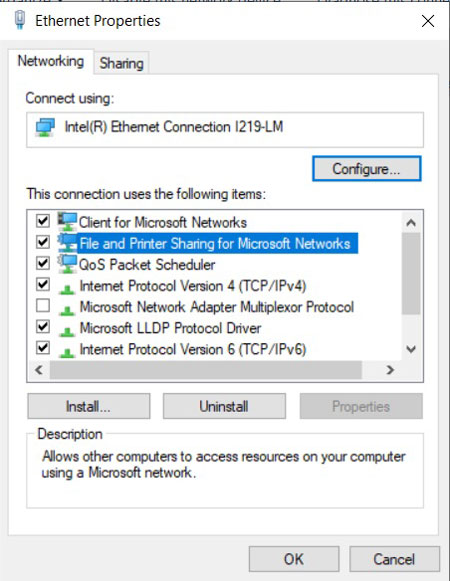
Now restart your system
Check Advanced Sharing Options to access the downloaded file
You may need to change the settings of Advanced Sharing Options to fix the problem of accessing the taped file. To change, you can do the following steps:
- Open the Windows Start menu. Enter the Windows settings
- Click on the Network & internet option
- Select your network card from the left side
- At this stage, if you are using a cable to connect to the network, select the Ethernet option, and if you are using Wi-Fi, select the Wi-Fi option.
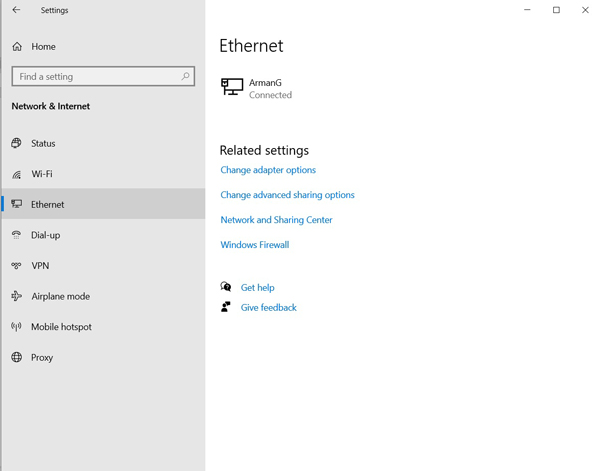
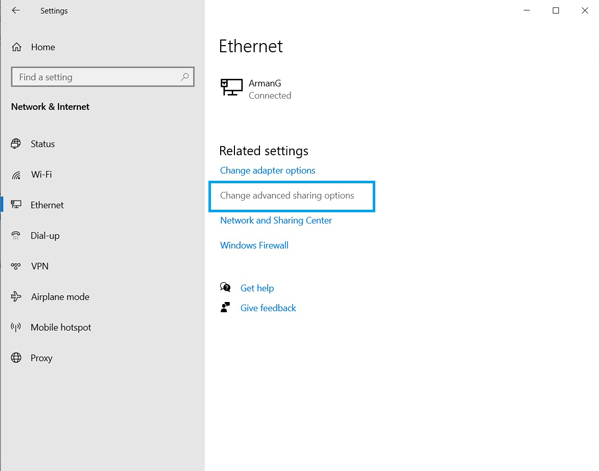
5. Then select Change Advanced Sharing Options
Now check the following in the opened window:
Private section settings
1) Check the Turn on Network Discovery option in the Network Discovery section. And then select Turn on automatic setup of network connected devices option.
2) In the File and printer sharing section, select the Turn on File and printer sharing option.
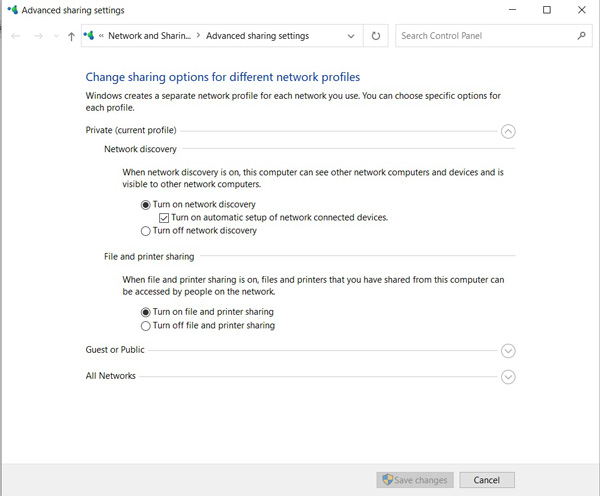
All Networks section settings
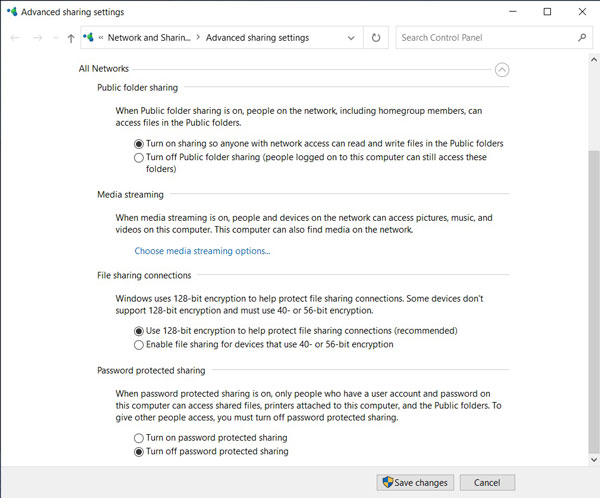
Finally, click Save Changes
Conclusion
In Windows, folder sharing is a useful feature for sharing information and files with others. This feature allows you to easily collaborate. and share your information. By following the steps outlined in this article, you can share your folders and take advantage of this feature.


