The easiest way to start Windows 11 without internet
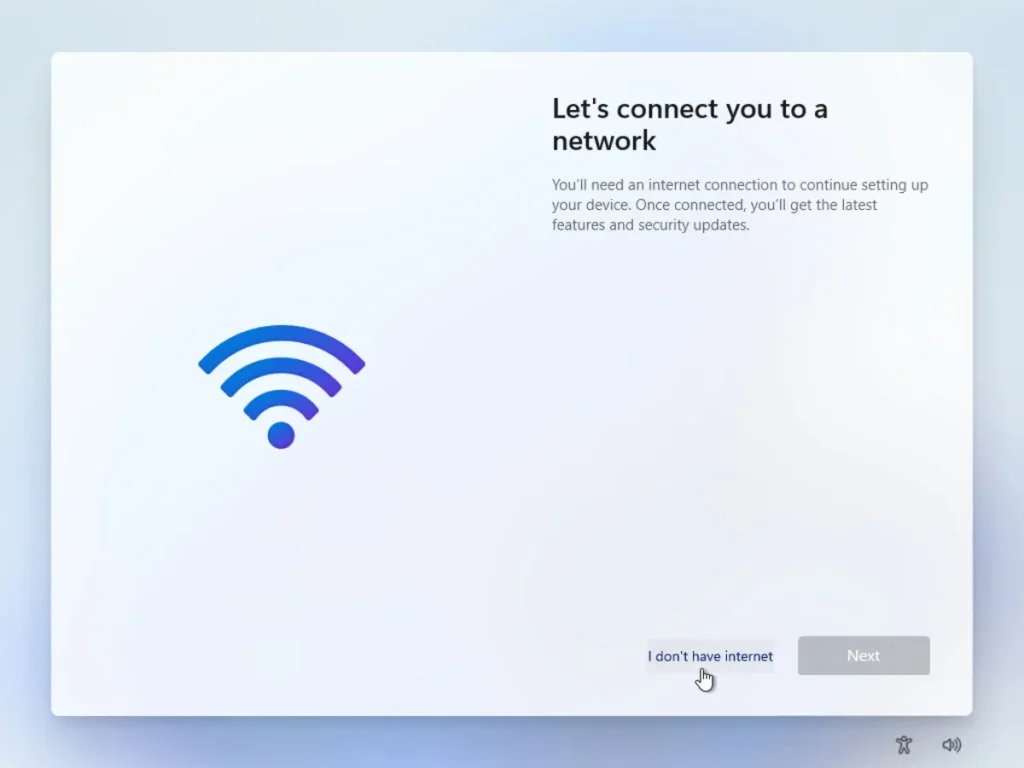
If the Windows 11 setup steps are stuck on the Let’s connect you to a network screen due to the lack of Internet connection, in this case, the Next button is grayed out until a stable connection is established and you cannot proceed to the next steps.
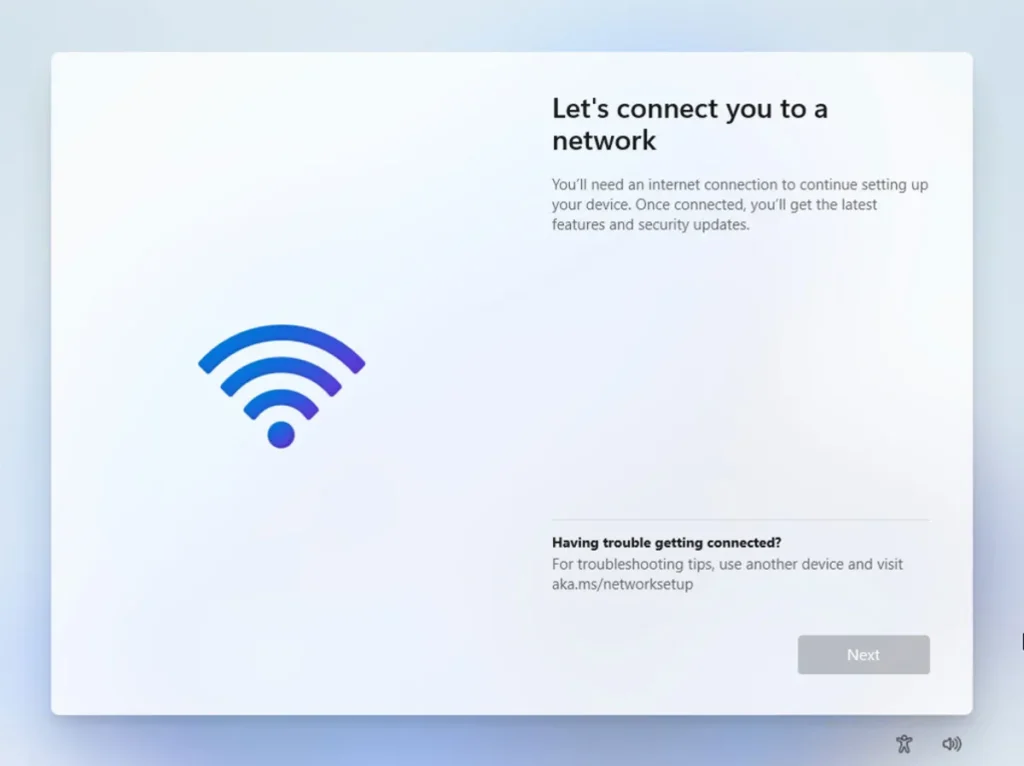
Not only in this situation, but also if you need to enter the username and password through the portal to enter the network, you cannot do anything and you have to bypass this step. In this situation, follow the steps below:In the mentioned screen, press Shift+F10 keys to open the command prompt window.
Enter OOBE\BYPASSNRO and press enter.
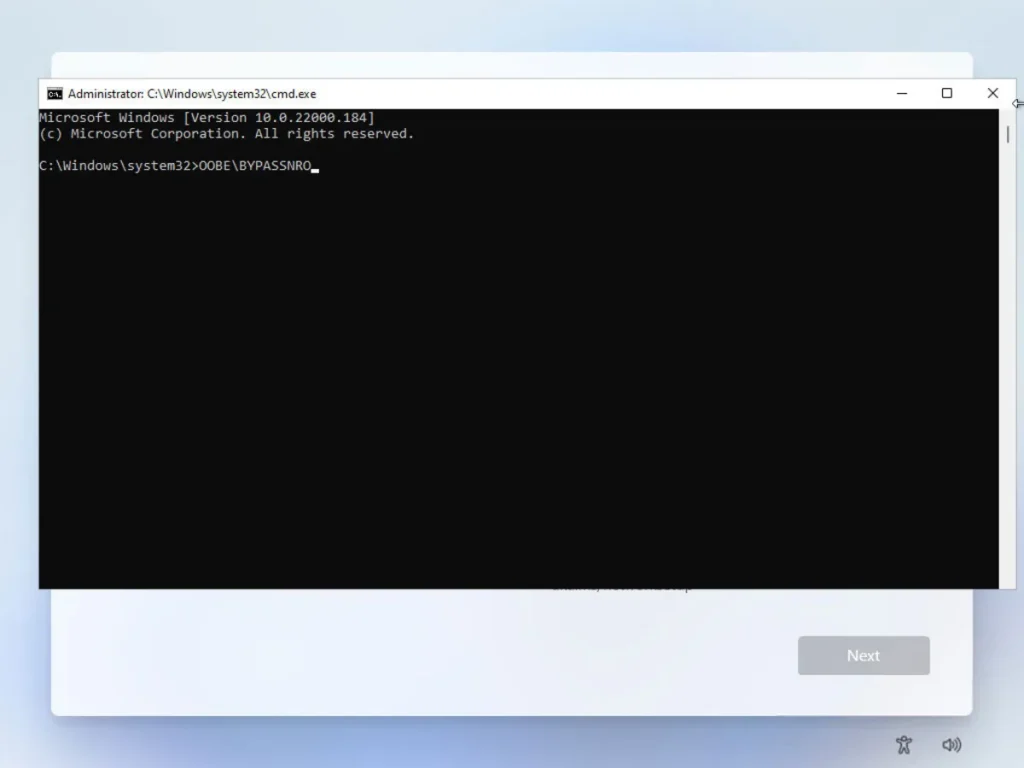
- Next, your device will restart. Go through the setup process again until you reach the Let’s connect you to a network page. Now, on this page, you will see that the I don’t have internet option has been added next to the Next option. Click on it.
On the next page, click Continue with limited setup.
After that, the page of creating a local account will be in front of you, and by entering the desired name and password on the next page, the local account will be created and the Windows 11 setup process will be completed. If you leave the password box blank, the account will be created without a password.
This method also works in all versions of Windows 11. If you encounter a problem in any of the steps, let us know in the comments section.

