In the rest of this article, we will teach you how to install Windows 11 on a laptop and how to solve the problem of installing Windows 11
How to upgrade Windows 10 to Windows 11 for free
After months of testing, Microsoft finally released the final version of Windows 11 in the Release Preview channel. You can go to Windows 10 Settings and get the free Windows 11 upgrade today. In the following, we will discuss the complete installation of Windows 11.
- Check if your PC is compatible with Windows 11 or not, you can find out by using Microsoft’s PC Health App.
- To get Windows 11, you need to go to Settings
- Open Settings and go to Update & Security
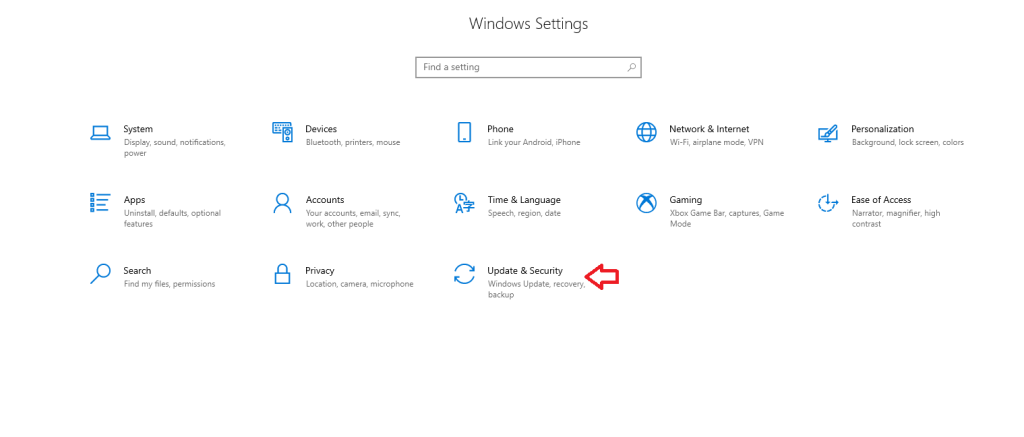
- Click on the Windows Update option
- Wait for the desired files to download
- The initial stages of updating Windows 10 to Windows 11 will start automatically
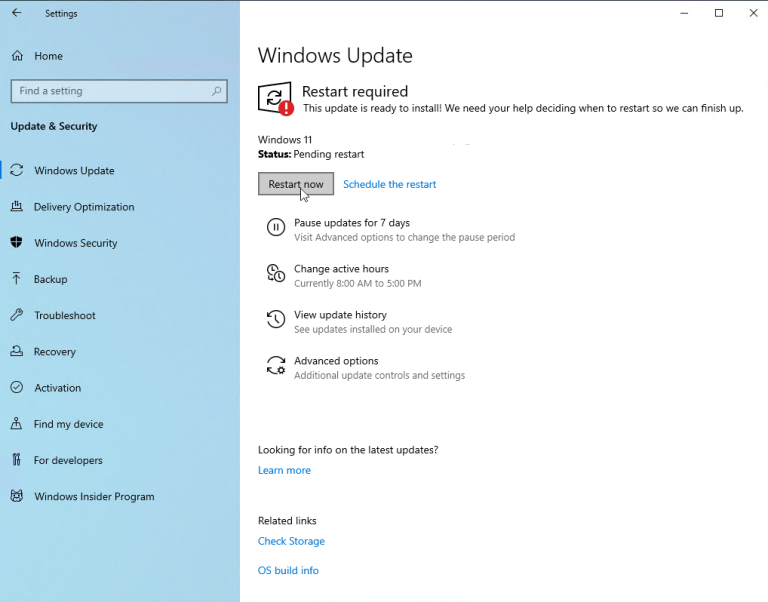
- If it doesn’t start automatically, click Install. You will be prompted to restart the device. Do this and complete the installation process.
Is my computer compatible with Windows 11?
You should keep in mind that the Windows 11 operating system is not compatible with most computers on the market, and one of the prerequisites for installing Windows 11 is to make sure that your device is compatible with Microsoft’s new operating system. If you are planning to buy a new computer or even a laptop, we suggest you buy a device that is fully compatible with Windows 11. Otherwise, you can use Windows 10 until 2025 when Microsoft stops supporting it.
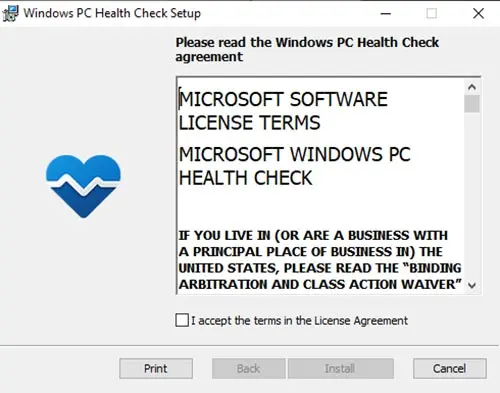
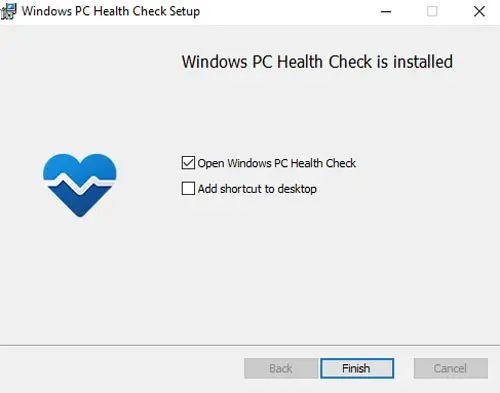
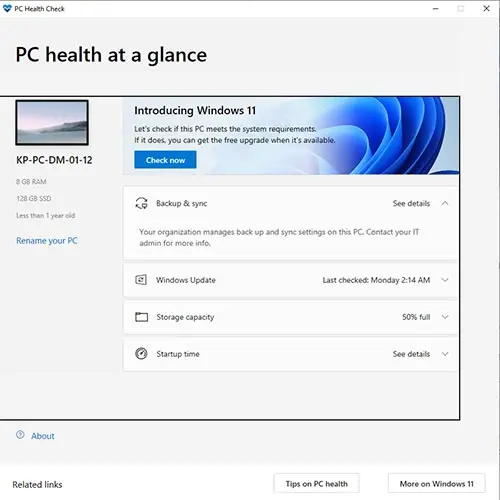
To understand this Windows 11 installation prerequisite, you need to download PC Health Check from the Microsoft website. Open the downloaded file, agree to its terms, and make sure you check the Open PC Health Check price. Finally, click Finish.
In the next step, a page will open on your computer, where PC health at a glance can be seen. On this page, you will see a box that says Introducing Windows 11. Click on this section.

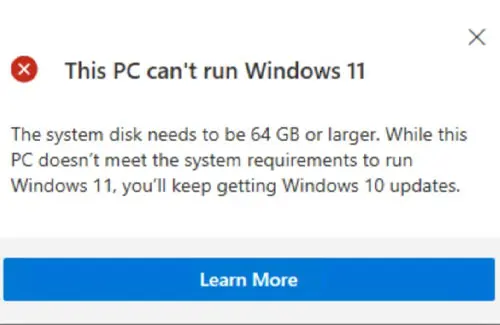
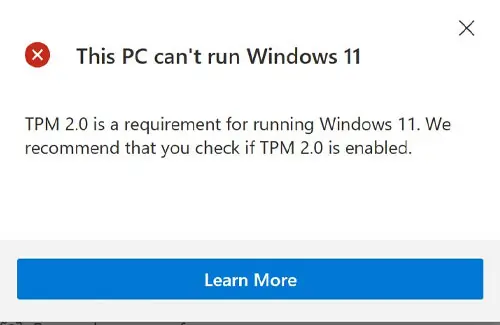
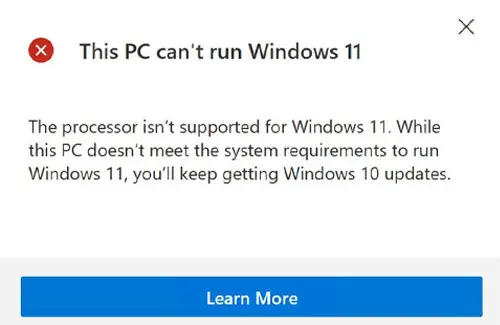
If your computer is not compatible with Windows 11, you will see the message This PC will not run Windows 11. In the following, you can see the messages that are shown when your system is not compatible with Windows 11.
If your computer is compatible with Windows 11, you can download this operating system for free on the site. But what is the method of installing Windows 11? In the following, we will discuss the method of installing Windows 11 on a laptop.
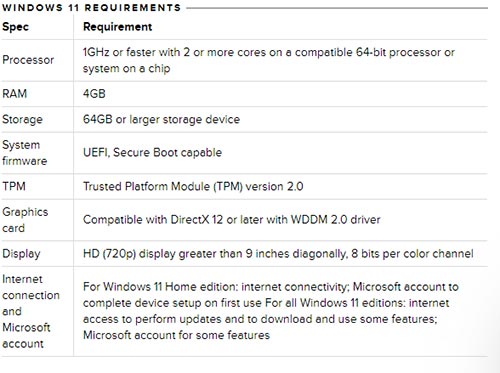
System requirements to install Windows 11
Before following the full Windows 11 installation tutorial, you should check whether your system has the minimum requirements for Windows 11 or not. Microsoft has also announced the system required to install Windows 11. To install this operating system, you will need at least 4 GB of RAM and 64 GB of internal memory. You must also have a screen with a resolution of at least 720p and a size of at least 9 inches.
Windows 11 download methods
If you have Windows 10 on your computer, the task is very simple and you can easily download and install Windows 11 through the Windows Update section of Windows that we explained above or through the Microsoft installation assistant that we introduce below. On the other hand, if you don’t have these conditions and for example, you have just bought your laptop, you should go to the next methods of this article and transfer the Windows installation file to a flash drive or DVD through Microsoft’s tool or Rufus.
Generally, installing Windows 11 on the system requires two different steps. In the first step, you need to download the Windows file and transfer it to a DVD or flash memory. In the next step, you should install this Windows and go through the initial setup steps. In this section, we will discuss how to download and transfer the Windows file to a flash memory.
How to download and install Windows 11 using the installation assistant
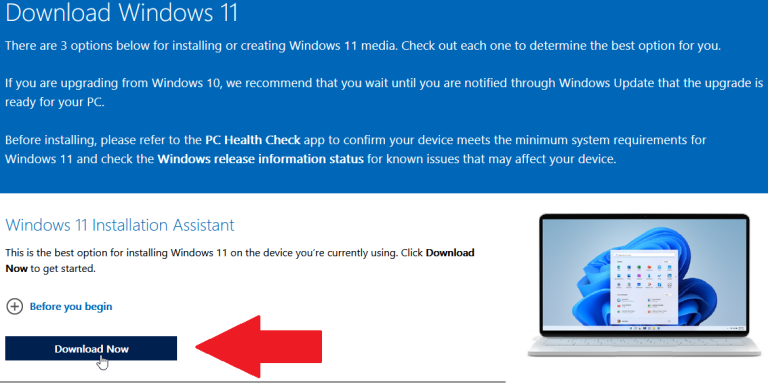
If Windows 10 is installed on your system and you have not received an update from the Windows update section, the best way is to use Microsoft’s installation assistant. Note that to use this method, Windows 11 must be installed on your laptop or computer. The tool in question was developed by Redmonds and allows the user to install Windows 11 with just a few simple clicks without spending energy, and for this reason, we consider this method of installing Windows 11 simple.
To access the installation assistant tool, first go to the dedicated page on the Microsoft website. On the page you entered, click on the download option. After the file is downloaded, run it. Install the Windows 11 Setup Assistant tool and then run the tool. After checking whether it is possible to install Windows 11 on your system, the tool in question will download the files required to install Windows 11 and perform the installation steps automatically.

After the Windows installation is complete, the program will ask you to restart the system. You can decide to restart the system now or postpone doing so in the future. Such an action allows you to save the files and information you need. After you restart the device, the final steps of Windows 11 installation will be completed. After completing the installation process, you can say goodbye to your old operating system and successfully migrate to Windows 11.
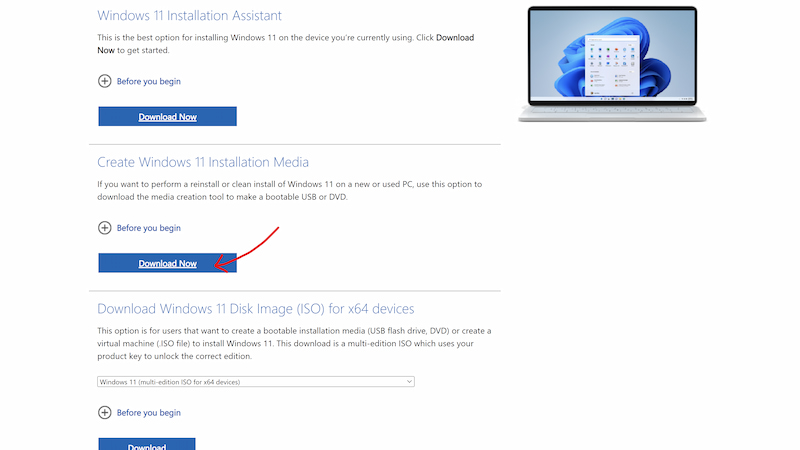
Using Windows’ own Installation Media
Microsoft company has a tool called Create Windows 11 Installation Media and in this way, it helps you to create flash bootable or transfer the Windows installation file to a DVD.
Connect a flash drive with 8 GB of space to your system. During the steps, all the information on this flash will be lost, and for this reason, we recommend that if there is any data on it, transfer it to another space;
Enter the Microsoft site and download the file as shown in the image ;
Press the Accept button during installation;
This program automatically selects the region and version of Windows. If the selected conditions are acceptable, click next, and otherwise, turn off the Use the recommended options for this PC check box;
- If you want the Windows file to be transferred to a flash drive, select the USB flash drive option and click the ISO file option to transfer Windows 11 to DVD. Finally, click on Next;
- In this step, choose the name of your flash memory and press next again (during the training, we only deal with the flash memory method);
- In the last step, click Finish.

From this point onwards, the Media Creation Tool will download the Windows 11 file and transfer it to a flash drive or DVD, so the process may take a little longer (depending on the speed of the Internet and the power of your laptop or computer). When the phrase “your USB flash drive is ready” is displayed to you, press “Finish” and then your flash drive is ready. Now you can enter this flash and click on the Setup option to start installing Windows 11.
If you have just bought your laptop and there is no operating system installed on it, this method cannot be applicable and you should use the next method which is Rufus.
Use the Rufus program
One of the best and course the most practical methods available is to use the famous Rufus program to transfer the Windows file to a flash memory and convert it to a flash bootable. In the following, we will teach you how to download the Windows 11 file and how to transfer it to a flash memory through this software.
Before doing anything, you must download the Windows file. You can download this file from reliable internal sites or go directly to Microsoft itself. We suggest that you download this file from Microsoft’s official website so that the probability of malware in it is zero and you can rest assured that the file is safe. To download the Windows 11 file from Microsoft:
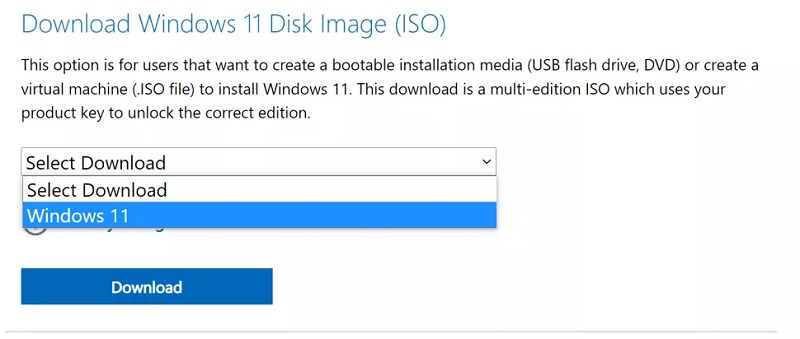
- You should go to the Windows 11 download page.
- Next, you must select Windows 11 from the menu at the bottom of Download Windows 11 Disk Image (ISO).
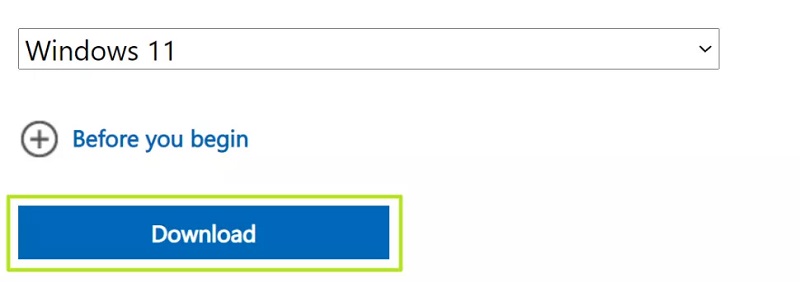
- Select the Download option
- Select the desired language and click on Confirm
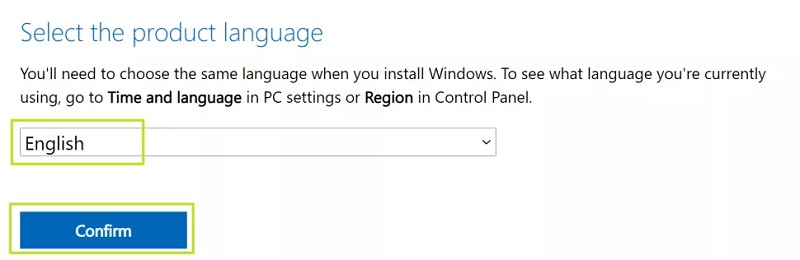
- Select the download option that was displayed
Now you can download a Windows 11 ISO file and save it on your computer
Now it’s time to get help from Rufus software. Go through the following steps:
- Go to the Rufus site and click Download to download the program. You can also get this program from reliable domestic sites;
- When the file is downloaded, run it
- Connect the flash drive that you want to make bootable to the system. Note that this flash must have at least 8 GB of space and the information on it will be formatted;
- Select Disk or ISO image from the Boot selection section
- At this stage, press the SELECT
- Select the Windows ISO file (the same Windows 11 file you downloaded above) and click Open
- Select Standard Windows 11 Installation from the Image option. If your system does not support the minimum requirements of Windows 11 such as TPM 2.0 + Secure Boot, select the Extended Windows 11 Installation option at this stage. One of the advantages of Rufus over the previous method is that it allows you to bypass the limitations of Windows 11 for older systems;
- Make sure that the Quick format and Create extended label and icon files options are checked
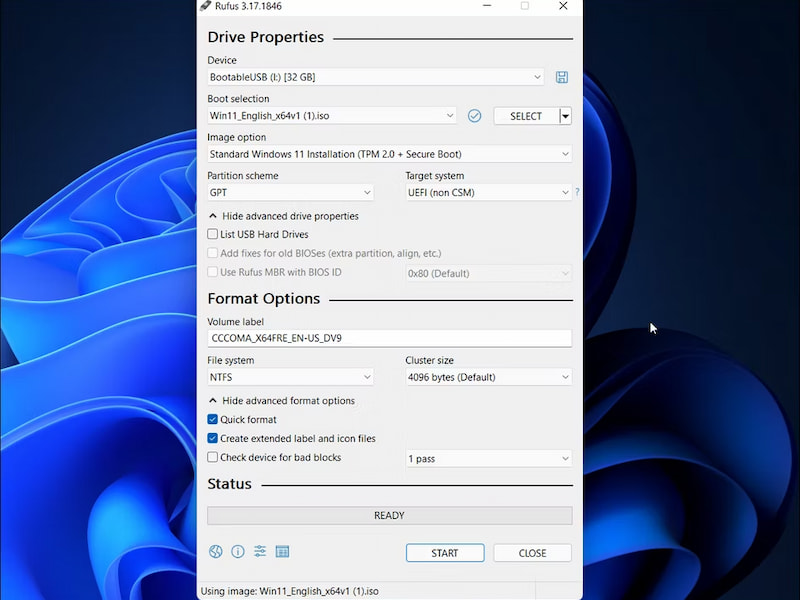
- Make sure that the Quick format and Create extended label and icon files options are checked
- Do not make any changes to other options available on the page
- Click Start to start the process
- entire! Your flash bootable is ready to use
How to install Windows 11
If your laptop or computer is currently using Windows 10, you can upgrade it to Windows 11 using the above methods, but if you have recently purchased your laptop and there is no operating system installed on it, you can upgrade it through Install Windows 11 on your laptop using a bootable flash memory that we have described above.
Before you can install Windows 11 on your new system, you need to make sure that the Secure Boot option is enabled. This feature is intended for greater security and checks every time the system boots that malware does not take control of your laptop. How should you turn on this option?
If you just bought your laptop and it doesn’t have an operating system, it will most likely enter the BIOS control panel as soon as you turn it on, but if for some reason it doesn’t, you have to enter the BIOS the same way for every brand or even model. For example, for newer Asus models, this company states that before turning on the laptop, you must hold down the F2 button and then turn on the laptop. For example, Lenovo mentions that you have to turn on the system and then press F2 or Fn + F2.

After entering the BIOS, look for the Secure Boot option in the Boot or Security section and activate it. Note that the shape and appearance of the BIOS of different laptops can be different and therefore it is not possible to express a single method and you have to find this option in the BIOS yourself. After you turn on Secure Boot, save the BIOS changes and exit the BIOS.
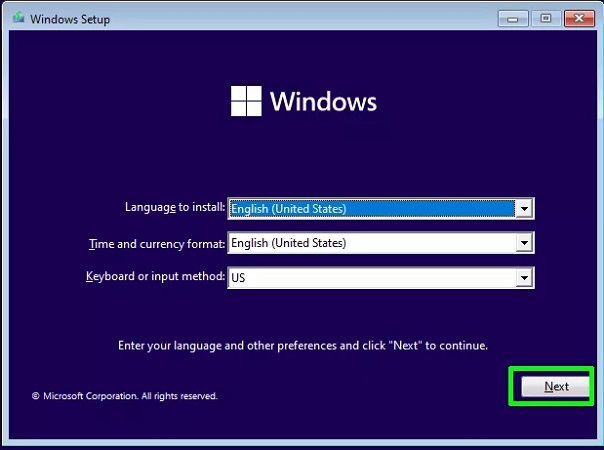
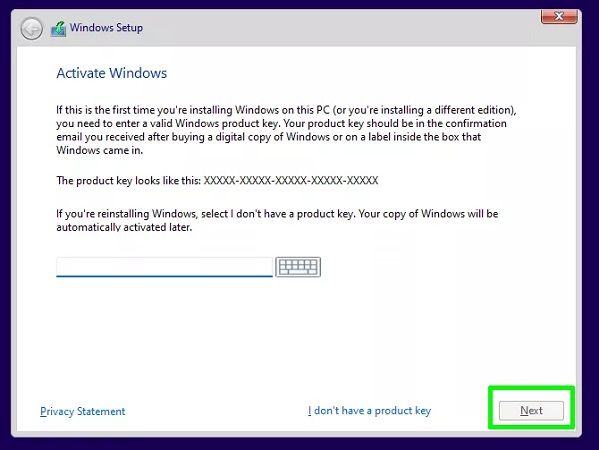
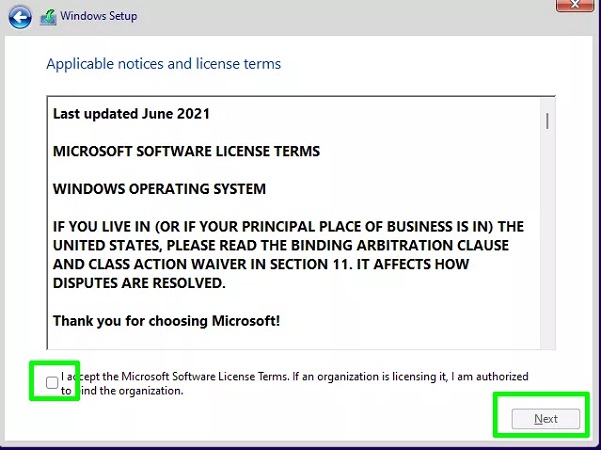
Turn off the laptop. Connect the bootable flash drive that you created above with Rufus to the laptop and turn it on. The laptop will automatically recognize the Windows on this flash memory and you will enter the installation process of Windows 11 and you must act as shown in the following images.
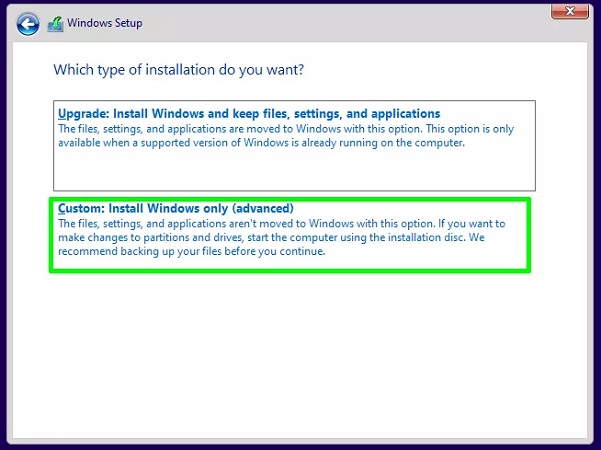
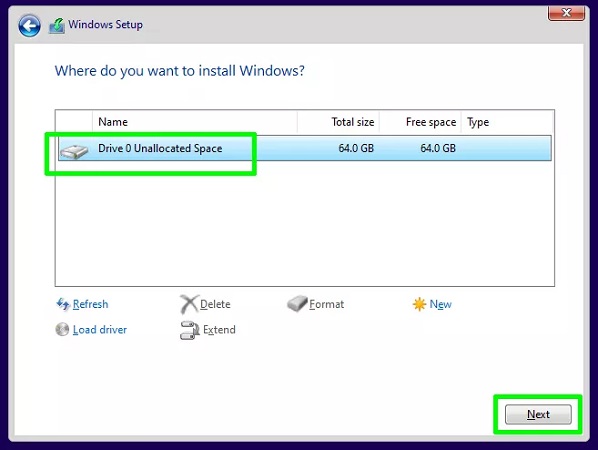
If you do not see any driver on this page, you should follow the instructions in this section. Intel’s 11th generation and newer processors use a technology called Intel Volume Management Device to reduce battery consumption and optimize performance. This will cause you to encounter the We Couldn’t Find Any Drives message on this page. To solve this problem , download the Intel Rapid Storage Technology (IRST) driver from the Intel site . Transfer this file to a flash drive and connect it to the system. In the image above, click Load Driver and select this file from the arrow. After the IRST driver is installed on the system, your drivers will be recognized and you can proceed with the installation.
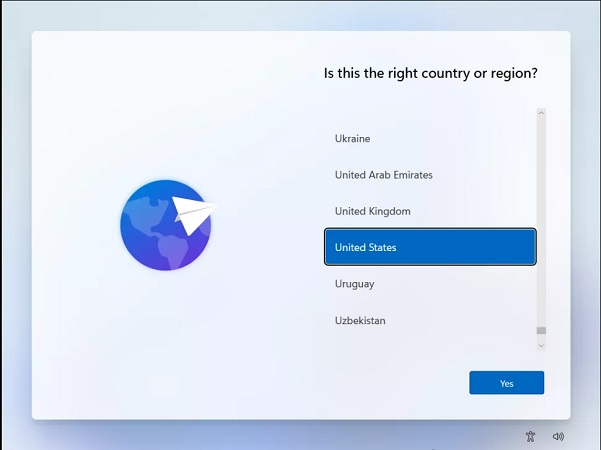
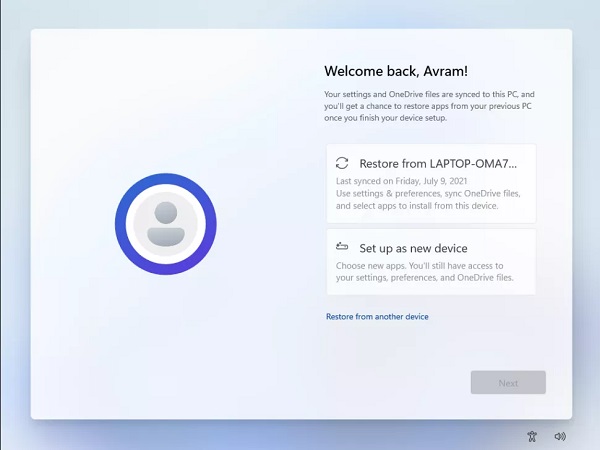
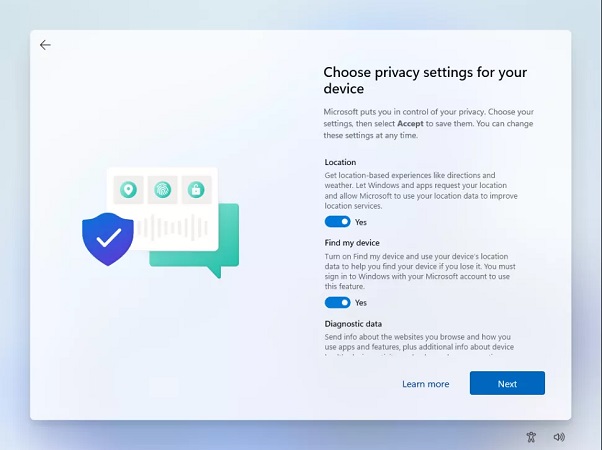
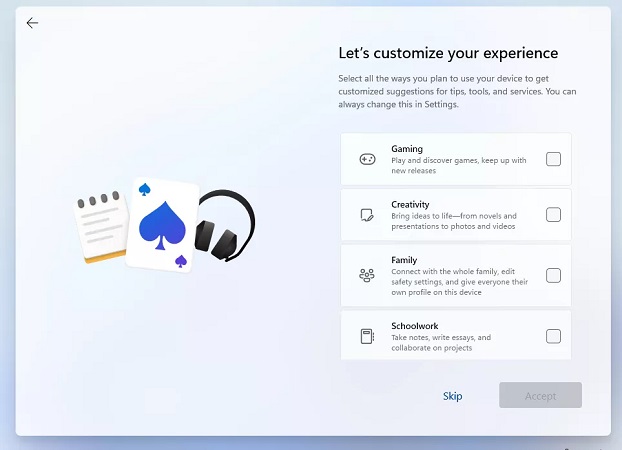
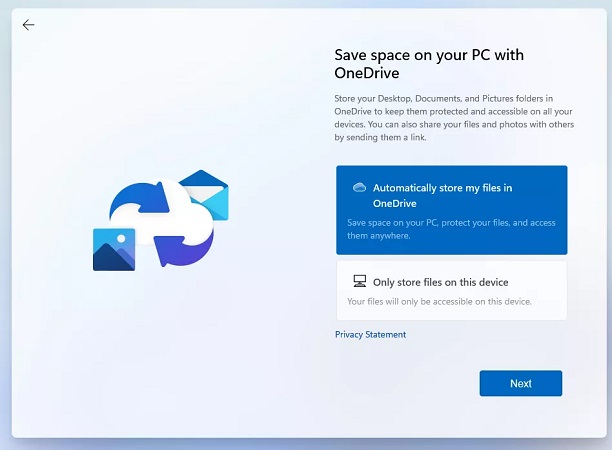
Next, you will see that the installer has copied some files and you may have to restart the device at this stage. Select your country or location and finally click on Yes. Also, if requested, set the keyboard layout.


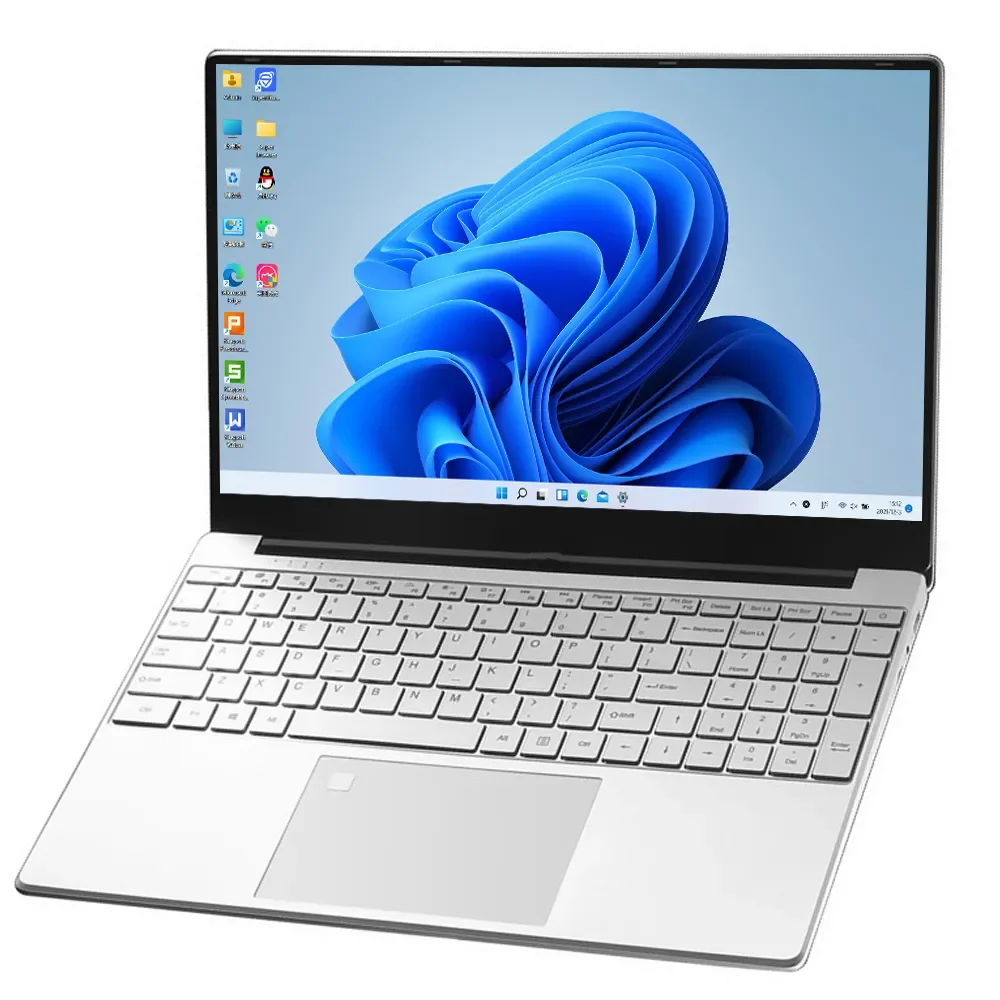
After finishing, you should see the Windows 11 desktop. Now you can start your work with the new Microsoft Windows or change various settings. For example, you can make Windows 11 look like Windows 10.
An overview of the changes made in Windows 11
After installing Windows 11, you will probably have fun with it. Microsoft’s latest operating system has many interesting features even in the trial version. This operating system benefits from a new look that has already attracted everyone’s attention. Now we want to tell you the biggest changes of Windows 11.
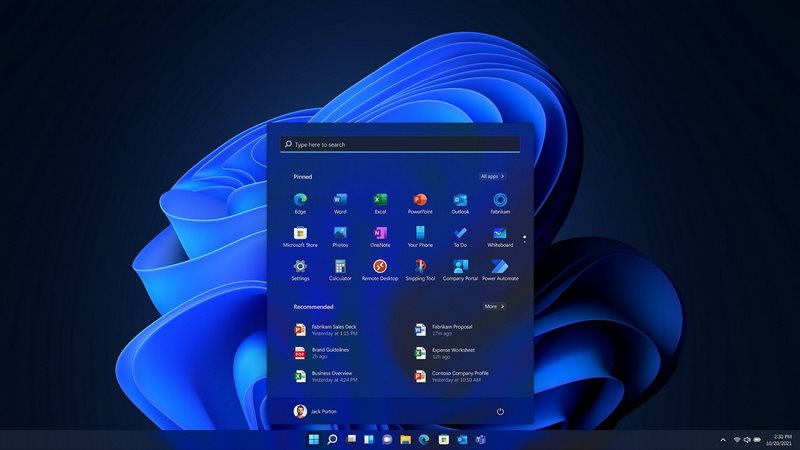
Design and user interface of Windows 11
Windows 11 has tried to get closer to the Mac operating system more than any other operating system. The design of Windows 11 is very simple and straightforward, and the menus have rounded edges. The familiar icon of the Windows operating system start menu has moved to the center instead of being on the left side of the taskbar. However, if you like, you can return this menu to the same place as before.
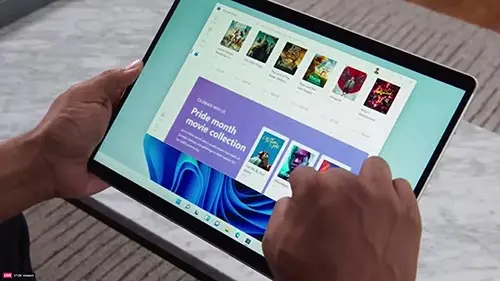
Installing Android application on Windows 11
Another main feature of Windows 11 is the installation of Android applications. Microsoft has designed a new store in collaboration with Amazon, where Android applications can also be seen. Many Windows users have been waiting for something like this for years and now they can experience it on Windows 11.

Better virtual desktop support
In Windows 11, you can use a virtual desktop. This section is more similar to Mac in the latest version of the Windows operating system. Now you can move between different virtual screens very easily. This part was more difficult in Windows 10.
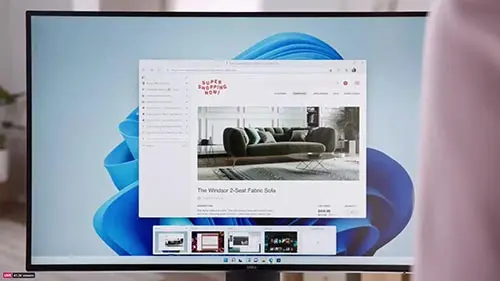
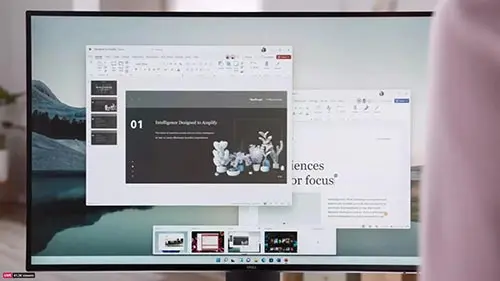
Easier transfer from monitor to laptop
Windows 11 uses a new feature called Snap Group and Snap Layouts. In this section, the applications that you have used recently are placed so that you can switch between them more easily. This section allows you to easily connect or disconnect another monitor without losing anything on the next screen. If you are thinking of buying a monitor on the occasion of the Windows 11 release, it is better to buy a high-quality monitor.
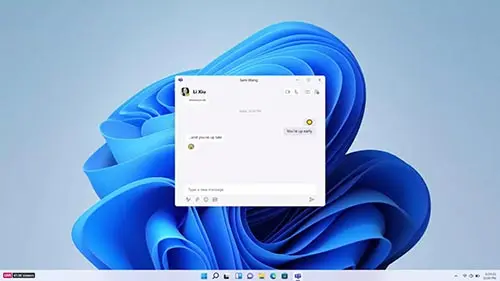
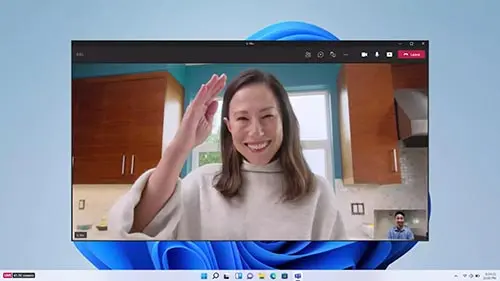
Adding Microsoft Teams to Windows 11
Microsoft has brought Teams to Windows 11 and made this messaging application fully compatible with this operating system. Tims is placed on the taskbar and access to it is very fast. You can now access Times from Windows, Mac, Android, and iOS platforms.
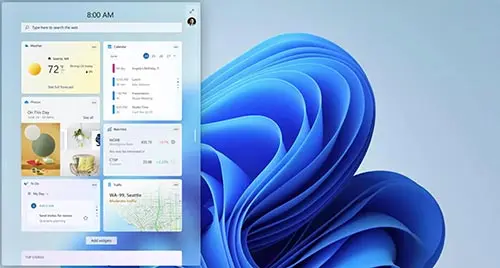
Adding new widgets
Widgets already existed on Windows. Now in Windows 11, you can access widgets from the taskbar menu.
Better touch screen, voice command, and pen support
Microsoft has made Windows 11 compatible with tablets better than Windows 10. The icons on the taskbar are spaced more apart to make them easier to touch. Also, more motion gestures have been added to this operating system. Windows 111 supports the digital pen and its special features. If your pen has vibrations or haptics, Windows 11 will make you feel the vibrations well. You will notice this while taking notes and drawing. In this system, you will also experience the ability of the pipe with sound.
Added Xbox technologies to improve gaming
Windows 11 plays a big role in running games on the PC platform. For this reason, Microsoft has brought some features that were only available on Xbox to Windows 11. Features such as Auto HDR and DirectStorage have been added to this operating system.

How to return from Windows 11 to Windows 10?
You can go back from Windows 11 to Windows 10 in two general ways, and it directly depends on the number of days that have passed since Windows 11 was installed on your system. If you have installed Windows 11 on your computer or laptop for less than 10 days, you can easily go back to Windows 10.
Microsoft company itself has considered this feature, if you are not satisfied with Windows 11 after installation, you can return to the previous version without any problems and in the easiest possible way. For this, just go to the settings and then the System section, and after selecting the Windows update option, click on Additional recovery options.
By doing this, a Recovery options option will be added to the menu. Now, in this section, click on the Go back option. As soon as you select this option, a blue screen with the message “Getting thing ready” will be displayed on the screen and you have to wait a bit.
In the next step, Microsoft will ask you why you want to go back to the previous version and you have to choose your reason or even explain it. Next, Windows will ask you whether to look for newer updates or not, at this stage you should choose No thanks.
At this point, Windows will explain to you that this process may take some time and you should be patient until the water runs out. Also, note that this may require you to reinstall some of your programs. Click Next to skip this step.
Finally, in the next step, you have to select Next and finally Go back to Windows 10.
How to find out how many days have passed since installing Windows 11?
There is no way to do this and you have to keep track of this date yourself. We suggest that when you install Windows 11, you set a reminder on your phone or laptop for the next 9 days so that if you don’t like this version, you can easily return to the previous version.
How to return from Windows 11 to Windows 10 after 10 days?
If more than 10 days have passed since installing Windows 11 on your system, you can no longer use the first method and you must go to the second method. In the second method, you have to install Windows 10 on your laptop or computer in the classic way.
That is, first, you have to transfer the Windows file to a flash drive (of course with your methods) and then go to the boot menu of the laptop and delete your previous Windows and install the new Windows.
In the following, we will teach you these steps and you must follow these steps:
- First, make sure there are no important files on your primary drive; Because this drive is completely formatted in the process of reinstalling Windows. If your laptop has only one main drive, be sure to transfer your important information to a hard disk.
- Download the Windows 10 installation file to your laptop. This file is probably about 4 or 5 GB in size.
- Choose an 8 GB or more flash drive and connect it to the system. Note that the flash drive is formatted during the Windows installation process, and if there is important information on it, be sure to transfer it to your laptop or hard drive.
- Download and install Rufus. Then run this program and select exactly the flash connected to the system.
- Next, you must select the downloaded Windows file in this program and then set the option in the program to MBR instead of GPT (of course, if the flash menu is not read in the boot menu, you must select GPT again, but most laptops and systems work with MBR).
- Now select Start to move Windows 10 to Flash for installation. This process may take about 30 minutes depending on the speed of your system and flash.
- Next, search for your laptop model in Google along with the Boot menu so that the buttons for your laptop to enter the Boot menu section will be displayed to you. This combination of buttons or even a single button can be different for different systems.
- Now turn off your laptop or system. As soon as it turns on again, select the necessary buttons to enter the boot menu. Now you will be transferred to the boot menu and you can simply select the flash connected to Windows in this section.
- After waiting for a while, it will be transferred to the Windows 10 installation section. In this section, you should select your preferred Windows type and the desired drive. Just remember to format your original drive that Windows was on first.
- The Windows installation process will take a little longer and finally, Windows will be installed on your system.
- Because, likely, you have not installed the original Windows on your laptop, after Windows comes up, you should crack it and finally install different laptop drivers on it
