
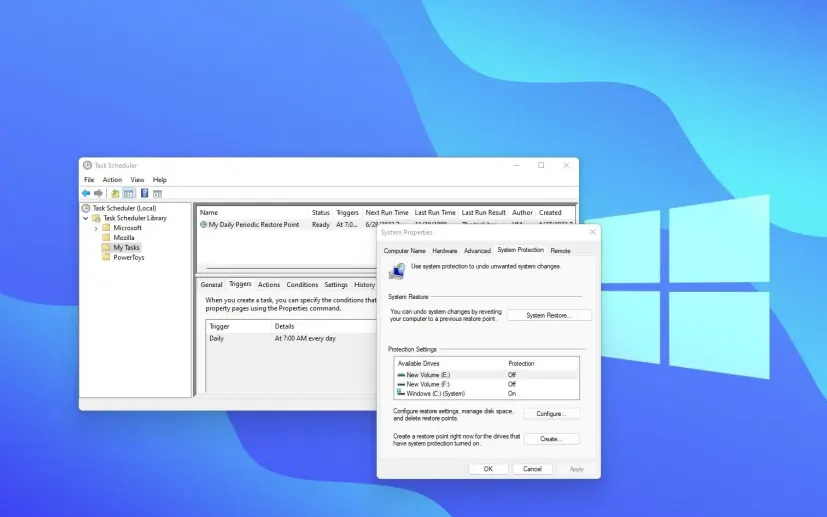
In Windows 11, using System Restore and Task Scheduler, you can automatically create a periodic Restore Point to roll back system changes.
In Windows 11, System Restore Point provides the possibility to undo system changes. With this method, it is possible to restore Windows to the previous state with System Restore Point.
The System Restore Point feature in Windows 11 can automatically detect and create a Restore Point at certain times, for example, when installing new programs or updates in Windows 11, it creates a restore point, and in case of problems, it is easy to You can go back to the state before installing these software. Since this feature does not create an image per event, the Task Scheduler can be used to create periodic restore points.
In this guide, you will learn the steps to create a Restore Point automatically, within one day, to restore your laptop/computer in case of a problem.
Activate Restore Point in Windows 11
To enable System Restore in Windows 11, follow the steps below:
- Open Start in Windows 11
- Search for Create a restore point and click on it to open the program
- In the Protection Settings section, select the system drive and click on the Configure button
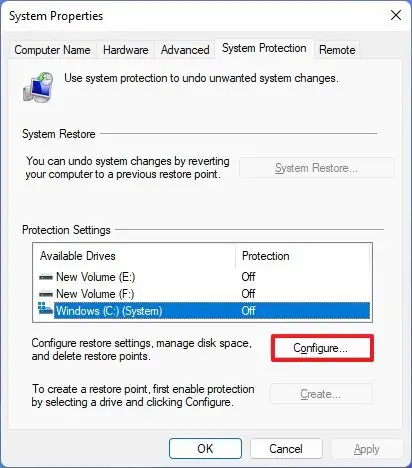
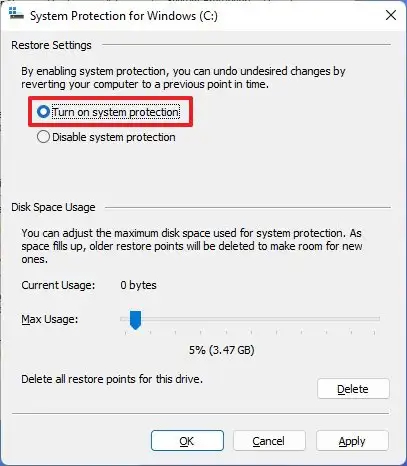
- Select Turn on system protection option
- Click on the Apply button
- Click on the OK button
System Restore Point is a tool that allows you to go back to a previous state of your Windows. By creating a Restore Point, Windows automatically saves a copy of the system settings, installed programs and drivers at a certain point in time.
Note that Restore Point restores the changes made in Windows to the previous state. To protect your files from one of the training methods for backing up from Windows 11 to a USB drive, how to backup in Windows 11 with File History? How to back up Windows with Veeam? Backup your Windows.
Creating a Periodic Restore Point in Windows 11
To create a Restore Point in Windows 11 automatically, follow the steps below:
- Open Start
- Search for Task Scheduler and click on it to open the program
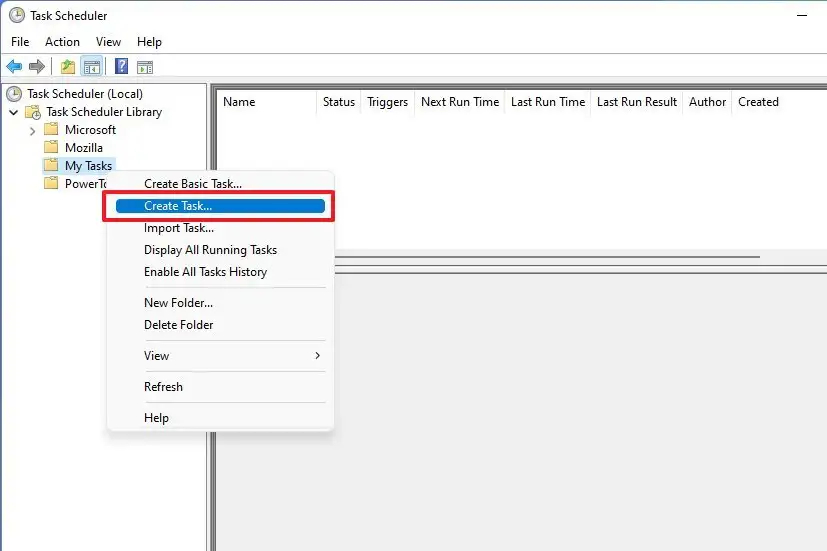
- Right-click on the Task Scheduler Library folder and select the New Folder option. (optional)
- Choose a name for the folder. For example: My Tasks
- Right-click on the My Tasks folder and select Create Task
- Click on the General tab
- In the Name field, type a name. For example, My Daily
- – In the Security options section, select Run whether the user is logged on or not
- Check the Run with highest privileges option

- Click on the Triggers tab
- Click on the New button
- Use the Begin the Task drop-down menu and select the On a Schedule option
- In the Settings section, select the daily option
- Configure the schedule settings (day, time and frequency) on the right side

- Click on the OK button
- Click on the Actions tab
- Click on the New button
- Use the Actions drop-down menu and select Start a program
- In setting and Program/script, type the “powershell.exe” command:
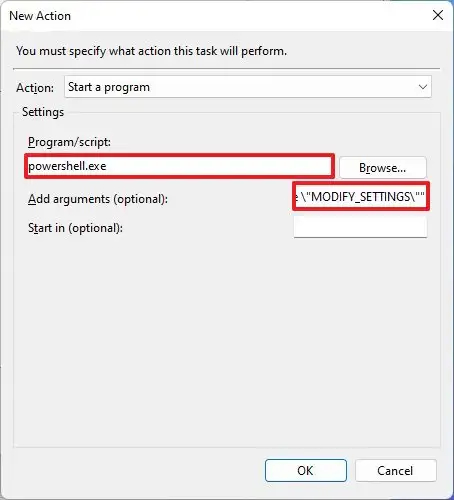
- In Add arguments (optional) settings, type the following command:
-ExecutionPolicy Bypass -Command “Checkpoint-Computer -Description \”My Daily Periodic Restore Point\” -RestorePointType \”MODIFY_SETTINGS\””
- Click on the OK button
- Click on the Conditions tab
- In the Power section, uncheck the options Stop if the computer switches to battery power and Start the task only if the computer is on AC power
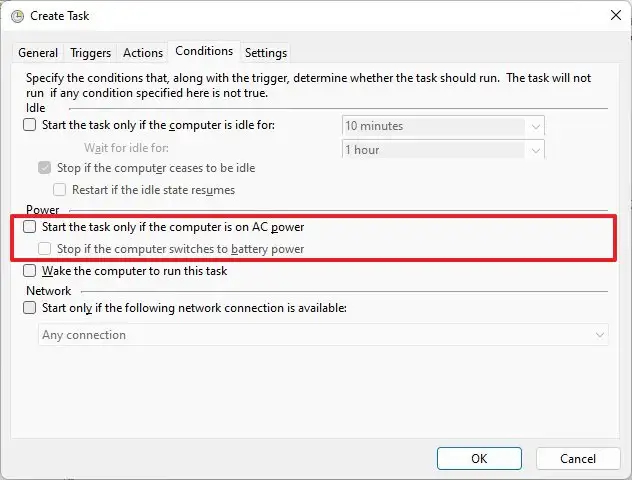
- Click on the OK button
- Specify your account password
- Click on the OK button
After completing the steps, a Restore Point will be created based on the schedule you specified

