It has happened to all of us that the files that we have in our flash or laptop/personal computer, internal and external drives are suddenly and unintentionally deleted. For this reason, we have found the need to recover deleted files from the memory at least once. It doesn’t matter if you deleted the files yourself or they were accidentally deleted, you can easily get them back with the methods we’ll explore in this article.
In this article, we will review the methods used to recover deleted files. In the following, we will see some methods to do this work directly on the computer and then we will introduce some software that appears very useful in this field
Recover deleted files without using a recovery tool
It is not always necessary to use programs and tools to recover deleted files. Here are the methods that you can use to recover your files without the need for special tools:
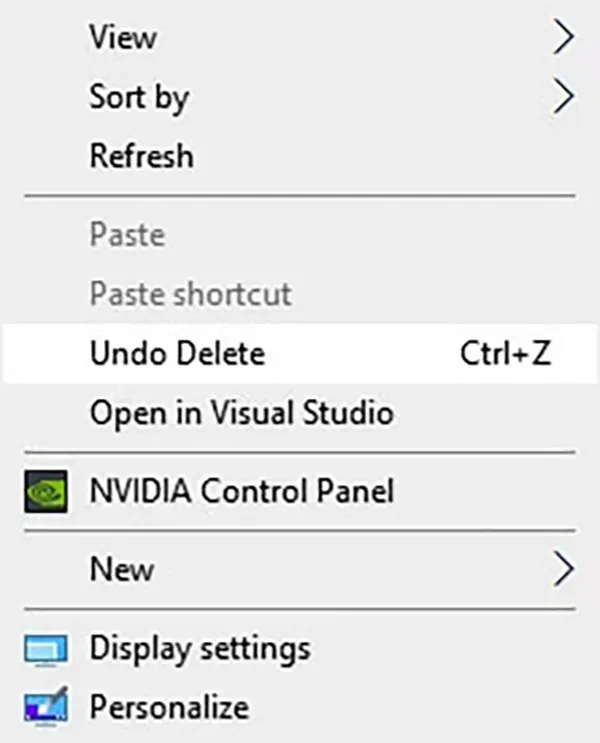
Method 1 : Using the Windows Undo feature
By using the combination of Ctrl + Z keys on the keyboard, you can undo the last command issued on a Windows computer. If you press these two buttons at the same time immediately after deleting your file, the operating system will go back one step and the file will be available again. Therefore, it is worth testing this method before entering any other command on your car.
Method 2: Recover deleted files from backup
If you have backed up your system in the past, you can use it to restore your deleted files. Naturally, the files in question must have been backed up, and this shows the importance of constantly backing up data. Depending on which version of Windows operating system you are using, you will have different tools for backing up and restoring them.
Use the instructions specific to each operating system:
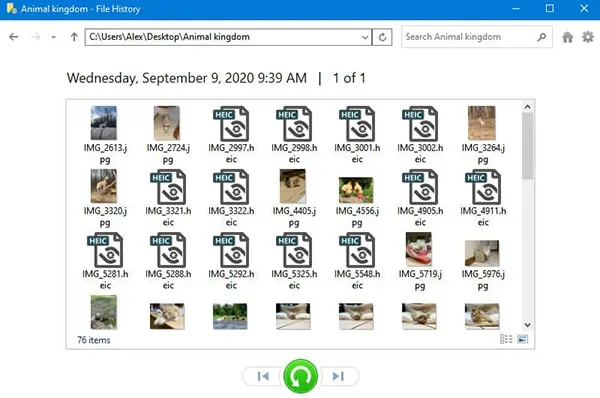
Windows 10
Open the folder that contains the data you want to restore with File Explorer
Click on the Home tab
Click on the History button to start the File History program
Select the data and version you want to restore
Click the Restore button and choose how to handle file naming conflicts
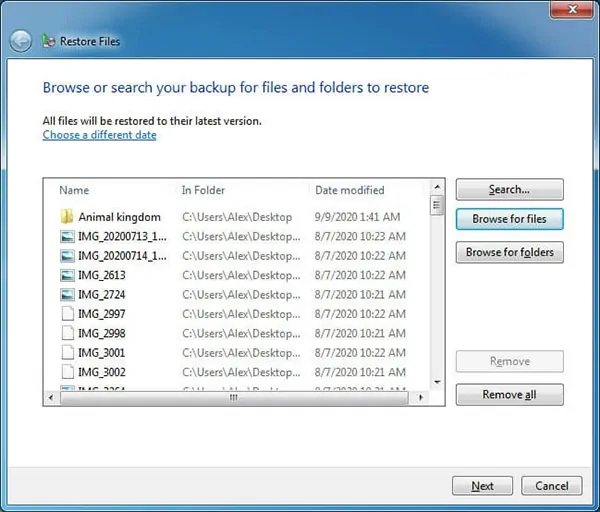
Open Backup and Restore. To find it, you can use the search bar in the lower-left corner of the desktop environment
Click Restore My Files
Select the files you want to restore in the Restore Files windows
Choose the location you want to store the recovered files and determine what the task of the duplicate files isOpen Backup and Restore. To find it, you can use the search bar in the lower-left corner of the desktop environment
Click the View Restored Files link and then click Finish to close the window
If you don’t have any backups available, you need to address the problem immediately. Regular backups are one of the best ways to recover valuable data that is accidentally lost.
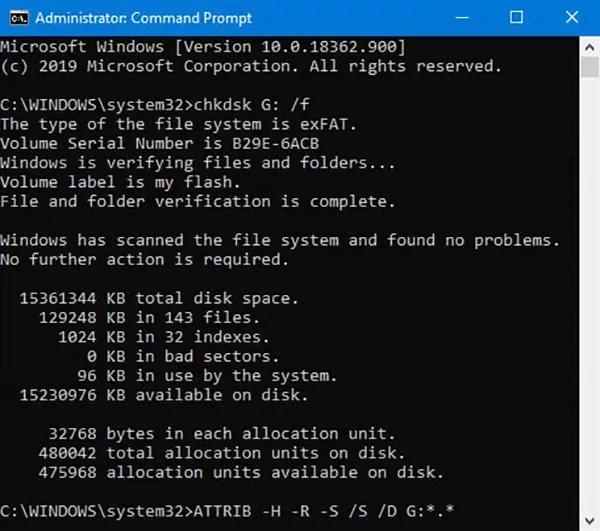
Metod 3:Using Command Prompt
Using a command line, you may be able to recover deleted files from your system.
To do this, open the Command Prompt application in Windows. You will be able to find it by searching for this phrase in the search bar in the lower left corner of the desktop.
In the window that opens, type chkdsk ‘drive letter’ /f and press Enter. Instead of drive letter, enter the drive letter where the file was previously saved, for example: chkdsk ‘E’ /f
Press the Y key on your keyboard to bring up the command line again
Enter the letter of the desired drive and press Enter
Now enter this command: *.* drive letter: Attrib –h –r –s /s /d F and again put the drive letter instead of Drive Letter.
This command can find drive errors and show hidden folders that might contain your lost data. Of course, the names of the files will be different in this case and therefore it will be more difficult to identify the files you want to recover. This method of file recovery is not so recommended and you should go for it as a last resort.
Metod 4 : Using third-party file recovery applications
In the following, we introduce some software that is very easy to use. Especially if you are afraid of working with CMD and the File History feature is not enabled on your computer, these tools can help.
Recover deleted flash files with Tenorshare 4 DDiG
Tenorshare 4 DDiG is a software that makes it very easy to recover deleted files In this software, data recovery from laptop/personal computer, internal and external drive, USB flash drive and recovery of more than 1000 types of files including photos, videos, documents and audio. It is possible to recover files lost due to accidental deletion, formatting, missing partition, crash, system crash, virus attacks,RAW file recovery. and it only takes a few simple steps to work with. So follow the steps below to recover deleted files:
Step 1: Download and install Tenorshare 4 DDiG
First, go to the Tenorshare 4 DDiG site ( + ) and click on the FREE DOWNLOAD button on the main page. With this, the executable file of the program will be downloaded to your device. Click on this file and follow the instructions on the screen to install Tenorshare 4 DDiG software on the system. You must install this program in a different location than the location of the deleted files. For example, the main system drive or SSD hard drive.
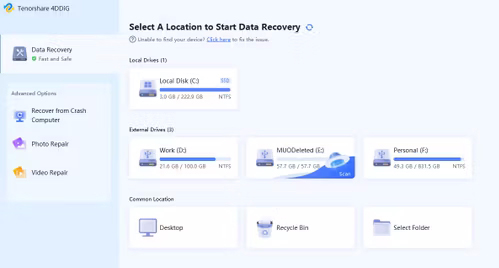
Step 2: Select the desired Drive for recovery
To recover deleted files, first open the Tenorshare 4 DDiG program and wait until the drives are scanned. At this point, you should see a list of all the devices that are connected to the system. Move the mouse over the file you want to recover and select the Scan option.
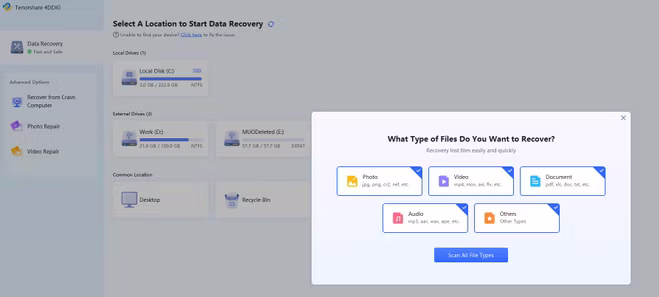
Then a new window will open which contains different types of files and you can choose from them. If you know the type of deleted files, you can select them in this list and speed up the recovery process. But if you don’t know, select all these options.
Tenorshare 4 DDiG software first performs a quick scan and then a deeper scan on files to ensure that no files are missed. Of course, you don’t need to wait for the deep scan to recover the files.
Step 3: Find and recover deleted flash files
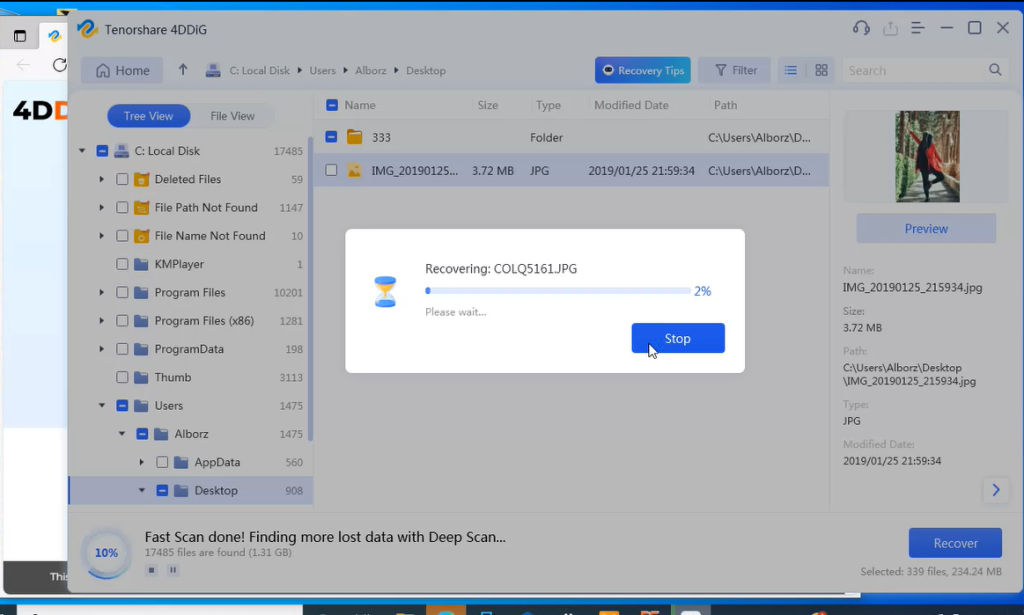
After the scan is finished, you can browse through the files found by Tenorshare 4 DDiG. First, go to the Deleted Files section. After the deep scan is finished, recently deleted files will be displayed in this section.
In this step, find the file that you want to recover and then click on it, then tap the Recover option at the bottom right of the screen. Note that you must choose a safe place for your recovery and make a backup copy of it just in case.
Reasons to use Tenorshare 4 DDiG
It is clear that Tenorshare 4 DDiG is not the only recovery tool available, but below are the reasons why using this software can help us better:
It’s fast and secure: Tenorshare 4 DDiG is built to be fast and secure. This means it looks best on any device and will protect data by keeping it local to the system.
It is easy to work with: this program makes the recovery of deleted files very easy. In this way, you can recover your files in the shortest time and with the least effort.
You can recover more than 1000 types of data: You can recover different types of data with this powerful Windows data recovery tool. Regardless of what you’ve lost, 4DDiG can effortlessly recover lost files, including images, videos, audio files, emails, office documents and zip files.
If you have a problem after activating the program, let us know in the comments and we will help you
Methods to recover deleted files on Mac systems
As a Mac user, you can go for several backtesting methods, each of which is highly dependent on your technical abilities, software prerequisites, and similar factors. We suggest that you try the following solutions in the same order that we have listed them.
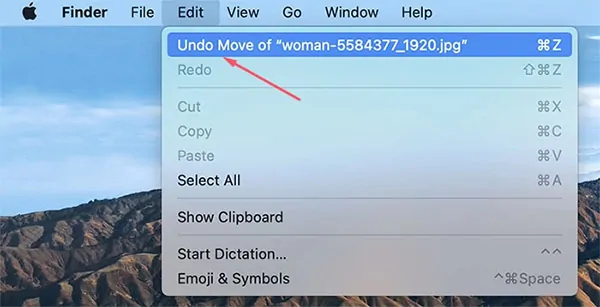
Restore deleted files with the Undo option
Make sure the app you used to delete the files (such as Finder) is selected.
Open the Edit menu in the menu bar.
Click on the Undo Move To option
It doesn’t get any simpler than this. The only problem is that most users realize the loss of their important files when it is too late and the Undo option has lost its effectiveness. Fortunately, the other methods discussed below are not as time sensitive. But once again, we emphasize that the faster you start, the better, and the probability of replacing your essential file with new files is lower.
Make sure the file is really deleted
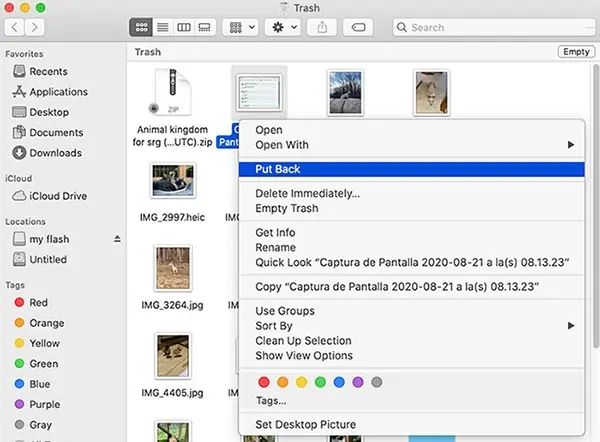
Although we all instinctively panic after realizing that important files have been deleted, many times a systematic search can yield fruitful results. Maybe you were working on a file and accidentally deleted it. You take a look at the Finder application and realize that the desired folder is not where it should be. The first place to look for files is the Trash Bin.
To do this, follow the steps below:
Click on the Trash Bin icon to open it
Start searching for the file that is missing.
If the desired file is found, right-click on it and select Put Back
It goes without saying that other methods of searching the computer may also lead to finding the lost file. You may have accidentally moved the file to another location and maybe even to the cloud. A Spotlight search or using Siri’s digital assistant can be a quick way to determine whether a file has simply been moved or is truly missing. If the file is deleted, read on for other ways to get it back.
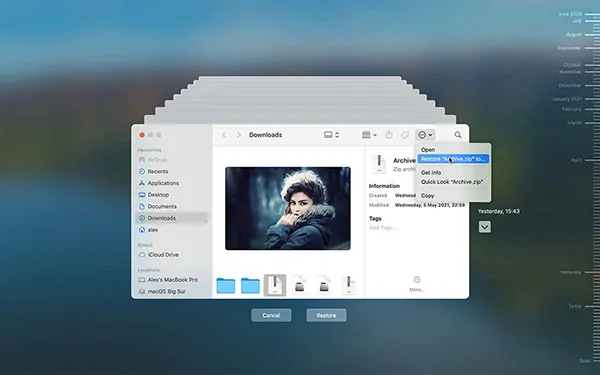
Recover deleted Mac files with Time Machine backup
Time Machine is Apple’s backup and recovery tool that is installed by default on your Mac computer and you should definitely use it for continuous backup of your valuable files. Backup shows its value when you realize that you have deleted some files both from the system and from the Trash Bin. Time Machine can recover even permanently deleted files.
To recover Mac files using the Time Machine tool, follow the steps below:
Connect the device that contains the Time Machine backup
Open the Time Machine utility
3. Open a Finder window in the location where you last viewed the desired file.
4. Scroll back through Time Machine until the desired file finally appears in the Finder window.
5. Select the file and click Restore to restore it.
Final Word
In this article, we have seen several different methods to recover deleted files. First, we introduced the third-party tools that are installed on your system. In the following, we reviewed some simple and free methods that are done with the help of Windows internal tools.
Note that you should always back up your important files so that even if something goes wrong, you don’t lose them forever. This is while enabling the File History feature on Windows can also be very helpful. So take action now and take preventive measures.